Today we are showing you, how to create Subsite in SharePoint 2016 step by step with screenshots.
SharePoint 2016 has a new UI and a new way to Create Sites or Subsites. The option is now located in View all Site Contents instead of the settings menu.
Let’s start the steps to create a subsite on SharePoint 2016.
- Click start on a windows server and search for SharePoint 2016 Central Administration or Right-click Computer, click all apps, and then click SharePoint 2016 Central Administration.
- Open any of site collection which you have exiting on your organization or default page.
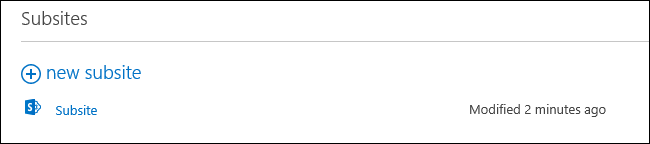
- Click on Site Settings Wheel in the upper right corner of your site and select “Site Contents” page. In the Site Contents Page, under Subsites heading click on “new subsite” Link.
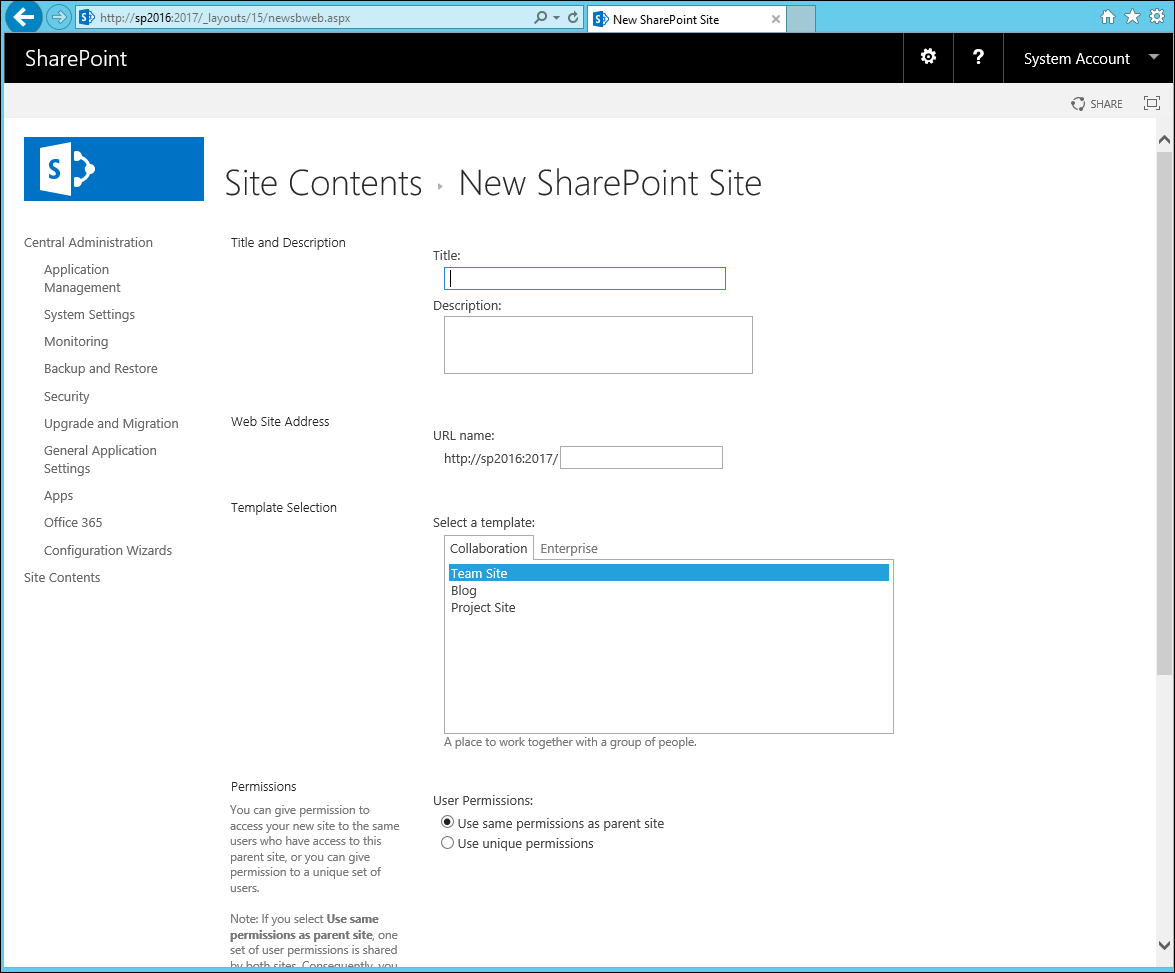
- It will take us to New SharePoint site page here select Title name and URL which you want and select template as well.
- Click on create a button to create a subsite for any of root site.
The snaps within your post sharing details in every post, which is really impressive and informative to be execute easily. Thank you so much. Best IT company in Coimbatore | Business solution provider in Coimbatore
ReplyDelete
ReplyDeleteAmazing! Your always provides us awesome information about Microsoft SharePoint Solutions. Keep it up!
Adana
ReplyDeleteErzurum
Sinop
istanbul
Düzce
PUCH
ankara parça eşya taşıma
ReplyDeletetakipçi satın al
antalya rent a car
antalya rent a car
ankara parça eşya taşıma
ED8HX3
EF8BA
ReplyDeleteTekirdağ Cam Balkon
Binance Güvenilir mi
Silivri Duşa Kabin Tamiri
Paribu Güvenilir mi
Kars Evden Eve Nakliyat
03C78
ReplyDeleteGiresun Parça Eşya Taşıma
Gümüşhane Şehir İçi Nakliyat
İzmir Parça Eşya Taşıma
Malatya Şehir İçi Nakliyat
Ankara Şehirler Arası Nakliyat
Etimesgut Boya Ustası
Urfa Şehir İçi Nakliyat
Düzce Evden Eve Nakliyat
Ünye Marangoz
A7647
ReplyDeleteXcn Coin Hangi Borsada
Wabi Coin Hangi Borsada
Bayburt Şehirler Arası Nakliyat
Expanse Coin Hangi Borsada
Bitfinex Güvenilir mi
Antalya Parça Eşya Taşıma
Çanakkale Şehir İçi Nakliyat
Çerkezköy Ekspertiz
Eskişehir Şehir İçi Nakliyat
94722
ReplyDeletebuy steroids
Erzincan Evden Eve Nakliyat
order primobolan
Bursa Evden Eve Nakliyat
Binance Güvenilir mi
buy testosterone enanthate
halotestin
testosterone propionat for sale
buy testosterone propionat
E5866
ReplyDeletesamsun kadınlarla sohbet et
hatay mobil sohbet bedava
karabük telefonda kızlarla sohbet
Antep Canlı Görüntülü Sohbet Siteleri
bartın ücretsiz sohbet uygulaması
burdur bedava sohbet siteleri
artvin sohbet muhabbet
Adana Sohbet Sitesi
bedava sohbet
3990B
ReplyDeleteısparta Rastgele Canlı Sohbet
tunceli canli sohbet
Burdur Telefonda Canlı Sohbet
Bayburt Canli Goruntulu Sohbet Siteleri
chat sohbet
edirne sesli mobil sohbet
ordu sohbet chat
ısparta Yabancı Görüntülü Sohbet Uygulamaları
Afyon Rastgele Sohbet Uygulaması
2BD10
ReplyDeleteLikee App Beğeni Satın Al
Bitcoin Nasıl Kazanılır
Twitter Beğeni Satın Al
Kripto Para Nasıl Kazılır
Bitcoin Nasıl Alınır
Lunc Coin Hangi Borsada
Binance Komisyon Ne Kadar
Likee App Takipçi Hilesi
Görüntülü Sohbet